The voltmeter is a tool for measuring the voltage needed for electronic work. We usually see it in digital form. It’s quite convenient. But when the education of children at beginner level We should choose to use Analog meter because I have used it before, durable and cheap.
Convert a galvanometer to voltmeter
My son want to make a simple DC voltmeter on 0-10V range by Convert a galvanometer to voltmeter. The Galvanometer DC1mA is cheap and easy with one resistor only.
Anyone’ve used all meters:
Voltmeter : for measure voltage; in volts unit
Ammeter ; for measure current; in Amperes unit
Ohmmeter; for measure resistance; in ohms unit
We think should start with a galvanometer as Analog meter cheap, somewhat less precise than digital types.
Best for finding the precise value of a voltage, current or resistance.
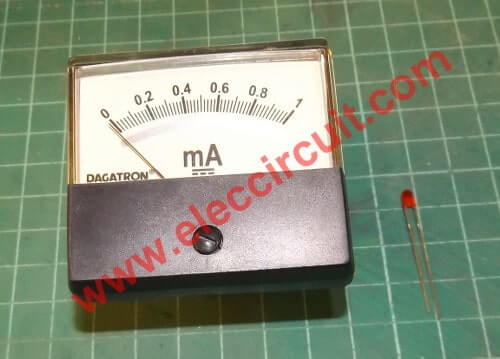
See the galvanometer very sensitive meter which is used to measure tiny currents, usually 1mA or less. It is a main display inside all meters.
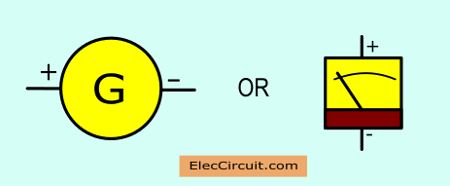
It is a symbol of a galvanometer.
Learn more: Electronics circuit symbols
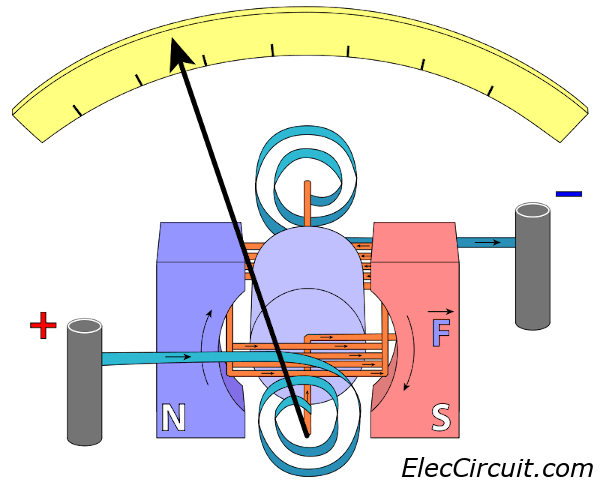
A galvanometer is a type of sensitive ammeter: an instrument for detecting electric current. It is an analog electromechanical actuator that produces a rotary deflection of some type of pointer in response to electric current through its coil in a magnetic field. As Figure 3 is the internal structure galvanometer.
Full scale voltage of the galvanometer
How it works
We want to use the galvanometer to measure the voltage of DC power supply 10V.
But, Can we use it?
We need to know the full scale voltage of the galvanometer before.
From principle V = I x R
Now we know the value I = current of meter DC1mA
But we do not know the resistance (R) Best way is measured directly is 234 ohms only.
Thus; V = 234 ohms x 1mA = 234mV or 0.234V
If we take it to measure the voltage 10V, the our galvanometer certainly damage as Figure 4.
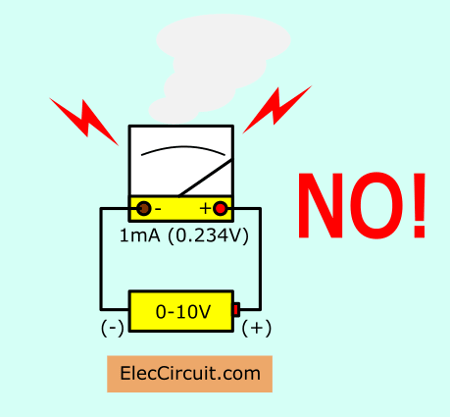
We can measure the voltage, when making the meter is equal to the voltage 10V only.
The voltage is difficult to understand Because invisible image.
I explained the voltage with a length of wood.
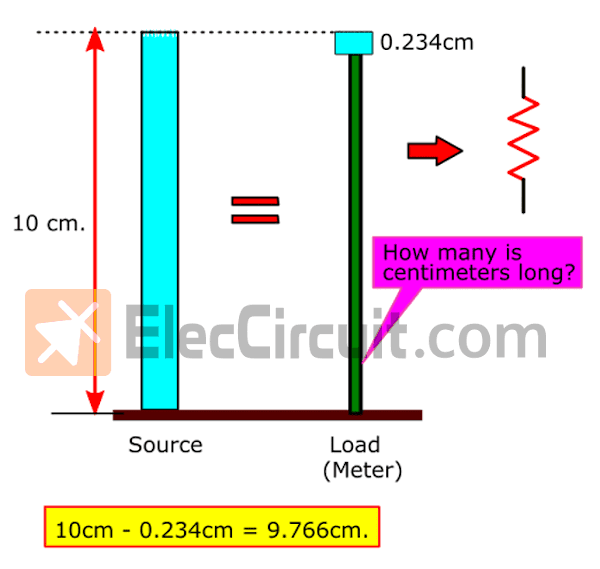
Compare the level voltage with a length of wood
On the left is wooden sticks length 10 cm as the source(DC power supply Input)
On the right is the small wood sticks length 0.234 cm only
How to makes both wood the same height as 10 cm (compared to 10V)
My son said very easy, just find another wood, braced it to the same height.
This Wood, we compare is a devices connected in series.
Which the best devices is resistor because cheap and easy to use.
How long is this wood?
10cm-0.234cm = 9.766cm
We compare the voltage with a length of wood.
Thus the voltage of Vs = 9.766V
Want more brilliant ideas? Here’s how to get them through electronic circuits.
How to find RS
When we know level voltage, then the following order of Rs lets’ find the resistance.
Figure 6 Try to find resistance of RS
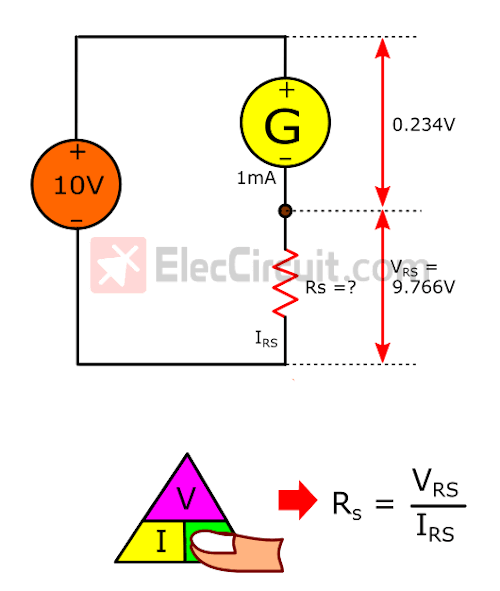
Rs = Vs / Is
We know the value Vs = 9.766V
When is a serial circuit Current flows through all devices are equal is 1mA (as galvanometer).
Rs = 9.766V / 1mA = 0.9766K
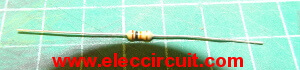
But this resistance does not sell I used 10K instead as Figure 7
How to test
We test the simple voltmeter as video below.
The build the voltmeter is easy. It would be helpful to learn of your electronics.
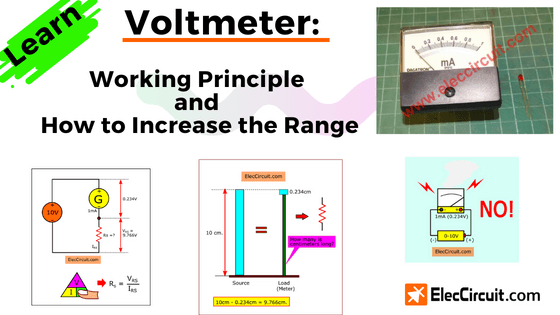
How do you increase a range of voltmeter
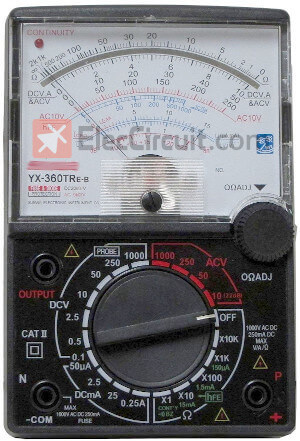
A cheap old multimeter as Figure 1 have very useful. But a its voltmeter range is so long cause see not clear such as the 2.5V range then away to 10V and then go to 50V range, it makes we can not read thoroughly. How can we extend the range of voltmeter?
If there are the 5-volt range to rises better or 25V range, it may help to measure voltage easily to read and convenient up. For example: measuring the 1.5-voltage battery has 1.0V to 1.6V range, or 12-volts battery which provide voltage output during 10V-15V range etc.
The ideal
a adding range, we need to know before that, scale on panel the multimeter are proper to application (as Figure 2) such as number: 50 can be also use for 5V or 500V or number 250 can be also for 25V.
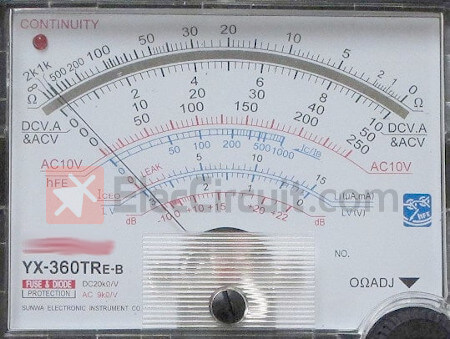
We will also have others scale that can roughly read (not well) such as a ICEO scale, normally leak current between C-E lead of transistor will full scale is : 15 can do as 1.5V range.
Which it is good to measuring, because generally rechargeable battery have voltage of 1.2V, when lower than 1.1V should re charge again. (In case the Ni-MH rechargeable battery only) But when voltage over 1.5V is fully can use them.
Understand the voltmeter before!
First of all, we set range of multimeter which called “a voltmeter”. Normally it same the common devices, when current flow through them cause a internal impedance (RM) and voltage across that range.
As principle, the good voltmeter that must have the many more internal resistances. And lowest current to reduce a bad effect to load.
See Figure below
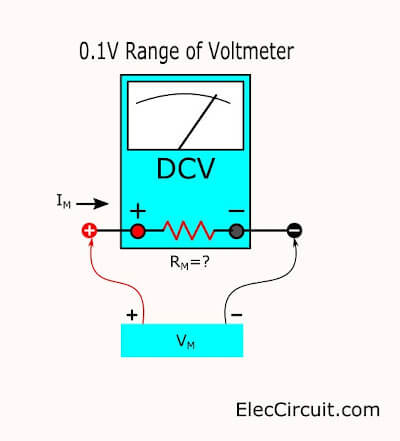
To see picture as natural form. We try to find the resistance meter (RM) better. I select the 0.1V or 50uA range since lowest so low error too.
the many ways for find them such as:
RM = VM/IM
Determined :
RM = Internal Resistance Meter
VM = Voltage across meter or voltage range
IM = Current in the range
In this case:
VM = 0.1 V, IM = 50 mA
RM = 0.1 V / 50 mA
= 0.002 M or 2 K ohms
Another, see panel will show the resistance per 1V. This meter has value : 20 k/V (20 k ohms per 1V) indicate that if the 0.1 V range has resistance of 2 k ohms there.
Also, if you do not have any way to measure the resistance directly. with the another ohmmeter I often this way such as modify VU-METER to the various tools by it is small and cheaper.
Try adding Measurement range
The modifying that voltmeter, should understand it before that When our main the meter is limited voltage as that ranges. We must rotate to 0.1V range only.
We will see that the main meter can get only voltage 0.1V. But we must to use voltage up to 25V so cause the meter can be damaged with this over voltage.
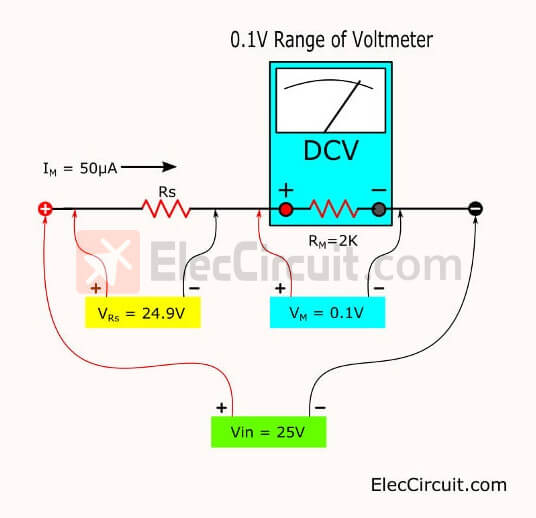
In this case we use also the resistor to reduce easily voltage from 25V to 0.1V. See picture it same connecting LED with normal resistor just charge LED into meter only.
Something we need is a simple formula which is Rs :
Rs = (Vin – VM)/IM
Try adding a simple Measurement range of 25V.
(How think, take Vin delete VM before, then take IM divided again)
Generally, common meter, always not show voltage value but indicting current (IM) only for example : VU-METER full scale of 250 uA
Thus we calculate voltage of meter (VM) before so easy : VM = IM x RM We can apply to find Rs:
Rs = (25V – 0.1 V) /50 uA
= 0.498m ohms or 498K
In this case we use 500K 0.25W instead which is closest.
For the error or deviation of meter. I do not worry because there are METER analog errors are common. But should not exceed 10%.
The Advantages of the meter needle is more easily able to see the changes digital form.
Hope you that use this idea to application the meter so well.
Not only that you can learn more here:
- Quick Learn Basic Electronic Components
- How do SCR works and basic circuits
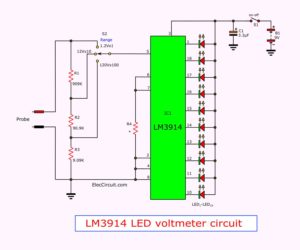
- Simple LED voltmeter circuit using LM3914
- How simple series circuit works
- Simple non-contact voltage tester using transistors
- 4 simple transistor tester circuits
Hi! My name is Aot. I like to play games. I’m 16 years old.
Now I rewrite article on our web with my dad.


Sorry to break this to you but; a “galvanometer” measures electron pressure or Voltage. It is not an ammeter.
Awesome Circuit!!! Teaches Ohm’s law and Kirchoff’s law.. Many Thanks Once Again From MR.OHM!!! Keep these Projects Coming!!!