My kids are very interested in LED. They want to make a LED flasher circuit, and more. Are you too? Today, we see LEDs in almost all electronic circuits. Why? Let’s learn the principles of the LED and how to use them.
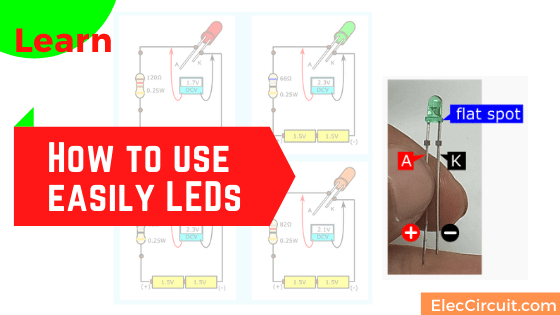
Why do we use LED?
An old light bulb wastes a lot of power by converting it into heat. But LEDs are much smarter. They convert almost all their power into light for a long time, if we use them right!
What is LED?
The LED is a light-emitting diode. It is an electronic component that is more complex than a lamp or an incandescent bulb. The LEDs have many colors to use. The important, they use a very small current,10mA.

There are many types of LEDs in general Electronic stores. But now I like to use a standard LED 3mm and 5 mm in diameter in my electronic circuits projects. Because they are so cheap.
Pinout of the LED
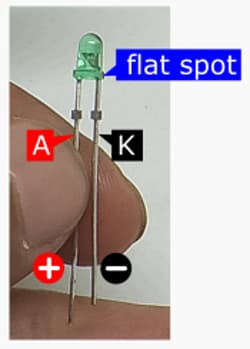
This image is close-up of a 3 mm LED and is its pinout. It has a polarity like a diode. So, we must connect it in the right way or forward biased. It will not light up if connecting is wrong or reverse biased.
When we found a close-up of an LED. Firstly, the longer lead is positive(+) or anode(A). The other lead is shorter, is negative(-), or a cathode(K).
But sometimes it is the same lead. We need to look at a flat side on the LED. It always indicates the cathode(K) or negative(-). So the other is positive(+) or anode(A).
Then, look at the symbol of LED compared with a normal diode.
Why use symbols? If you draw the circuit, if the actual shape, wastes so much time, symbols should be used.
It looks similar to the diode. The bigger triangle arrow will point the direction of the flowing current. The smaller arrows on the diagram tell the emitting light.
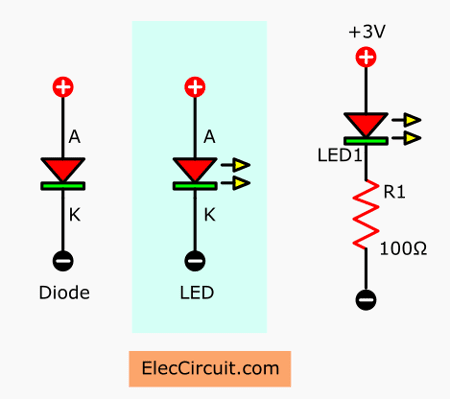
The general, does not show “+” or “-” on a diagram. It only shows the letter “K” to tell the cathode and A for the anode.
And, we often use the LED with a limiting current resistor.
Note: I think we do not need to understand the structure of the LED. At our level, just needing to use is enough.
Recycling free white SMD LED from e-waste
How to test LED
To begin with, how much voltage does LED use?
Parts you will need
- A 3 mm red LED
- A power supply
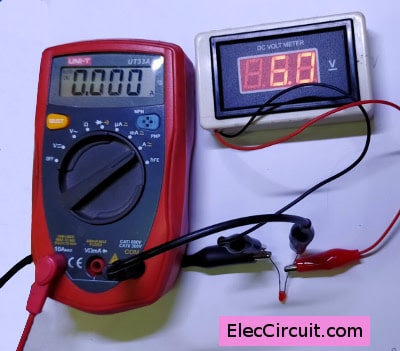
- Voltmeter in a multimeter
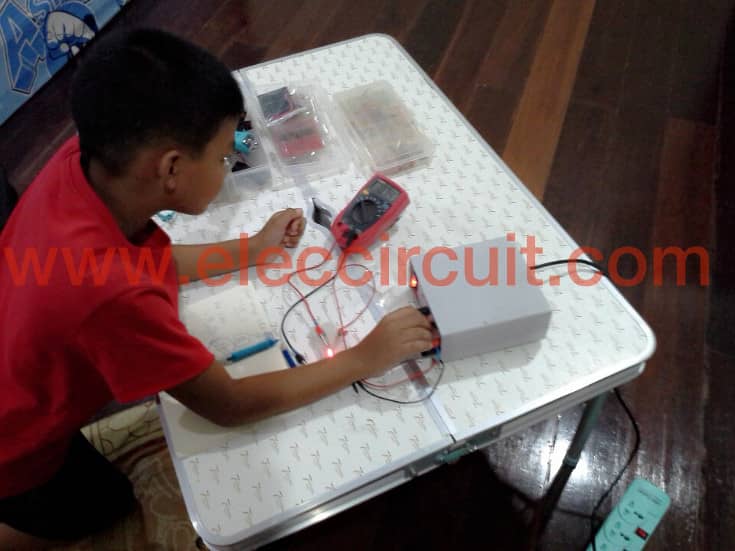
My son gets a 3 mm red LED on the breadboard. Because it does not require an electric soldering iron. Perfect for him.
Then, he tries to use the adjustable DC power supply,1.25V to 25V 1A. To power to the LED. Caution! To start with 1.25V only.
- Now, The LED goes out.
- Then, adjust the voltage up to 1.5V. But LED still goes out(no light).
- The LED glows up when the voltage is 1.7V.
- When he adds voltage up to 2.2V it is too much hot.
- At 1.8V, LEDs are Best lighting and normal temperature
Learn: Relationship Between Current and Voltage
The LED voltage
Normally, all LEDs require current via resistor about 10mA for a small size(3mm), and 20mA for 5mm. But each of its colors requires a different voltage.
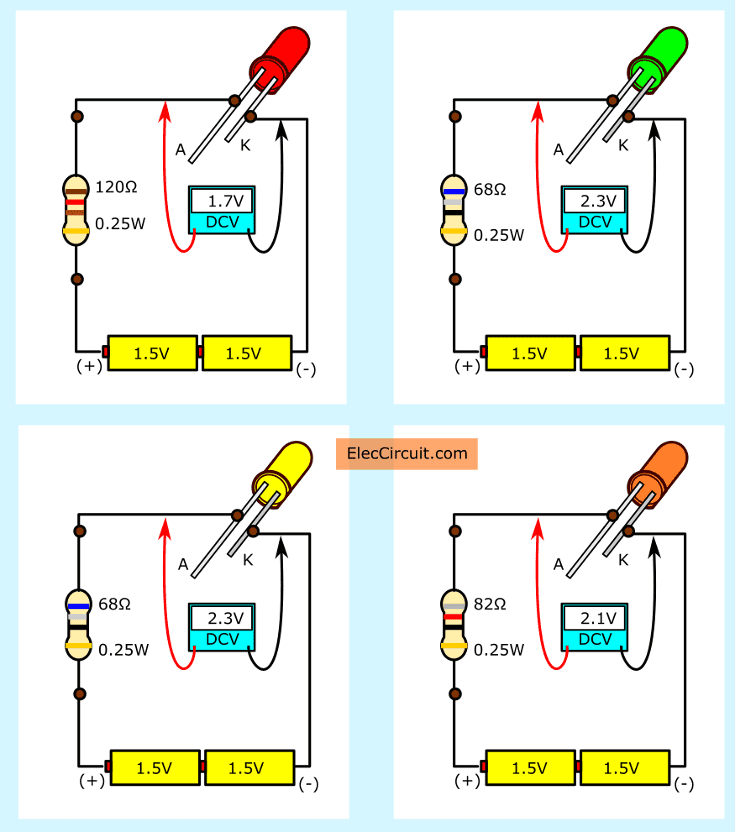
- Red LED: 1.7V
- Green LED: 2.3V
- Yellow LED: 2.3V
- Orange LED: 2.1V
- Blue LED: 3.3V
- White LED: 3.6V
This is a good character voltage drop. Because it is a constant voltage.
How to destroy an LED
When my daughter was 10 years old, I started teaching her electronics. She has many many questions. She asked:
- What is the maximum voltage a LED can withstand?
- Is 5 volts too much for LED?
- What happens if a high voltage is connected to an LED directly?
Let’s find answers to many of these questions by experimenting.
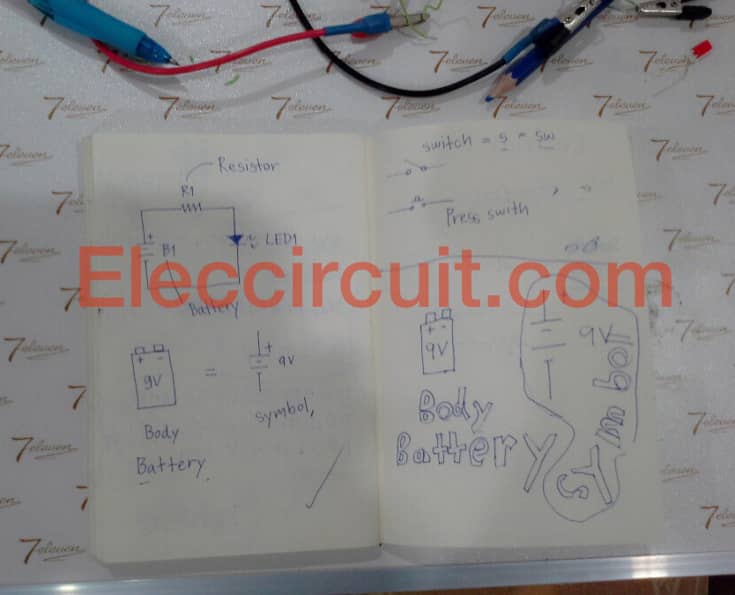
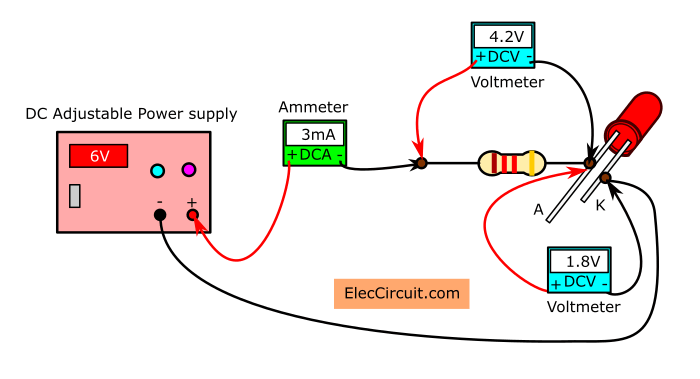
We experiment like above. But add an ammeter to measure the current of the LED as well. look below simple the illustrated schematics.
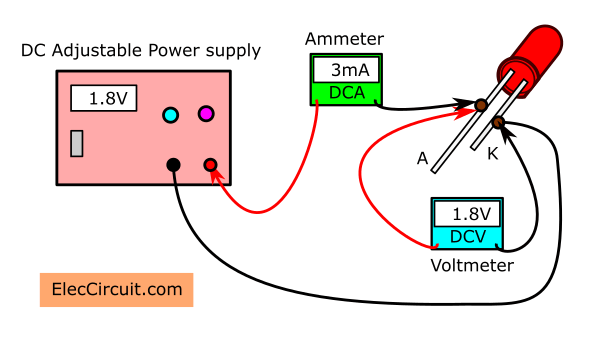
She experimented with a 3mm Red LED. As a test it started to light up when derivers the voltage about 1.7V at 3mA of current. Then we keep increasing the voltage. Sure, the current rises up. See the table below.
| Input Voltage | LED Voltage | LED Current |
|---|---|---|
| 1.8V | 1.8V | 3mA |
| 3V | 3V | 85mA |
| 5V | 5V | 151mA |
| 6V | 6V | 0A (LED broken) |
| 9V | 9V | 0A (LED broken) |
| 12V | 12V | 0A (LED broken) |
You can see that the amount of current in a circuit depends on the voltage supplied. If the voltage is too high, the current also increases a lot. When we touch the LED, the temperature is overheat, until be not able to touch.
Finally LED get destroyed, input voltage is 6V. No light, No current flows through it anymore.
In conclusion, the LED can be damaged because too much current flows through it. The electricity caused heat, which melted the LED.
Making the LED safe
The manufacturer states that the best current is about 10mA, which allows the LED to emit a fair amount of light. Its internal structure is low temperature. Maximum of 3 volts, and a safe current of 20mA.
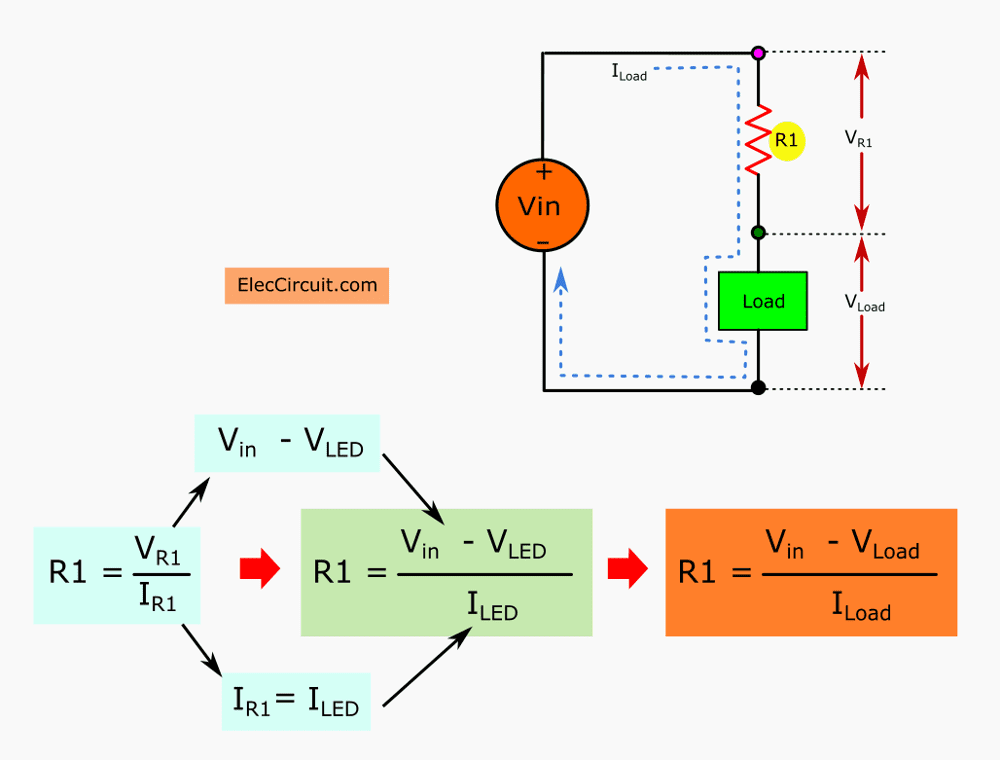
The easiest way is to use a series resistor to limit current to a safe value.
In the block diagram below. I will show you how to use the LED with a 3V battery via the limiting current resistor in four colors, Red, Green, Yellow, and Orange. They use different resistance.
From the above experiment, My daughter tested a 1.2K resistor in series to limit current. She measures the voltage at the resistor. She knows the 6V power supply can’t damage the LED anymore because the resistor divides the voltage to 4.2V.
Read full: Here is how to find the limiting current resistor.
But there is a downside: in the original resistor, if the input voltage is increased, the current will increase, too. According to the linear ratio, for example, if we increase the voltage to 12V, the current will increase to 9mA.
This problem is solved by a constant current circuit.
Why LED does not glow?
If you connect the LED in a circuit. But it does not work. Why it does not glow?
For example the two circuits below.
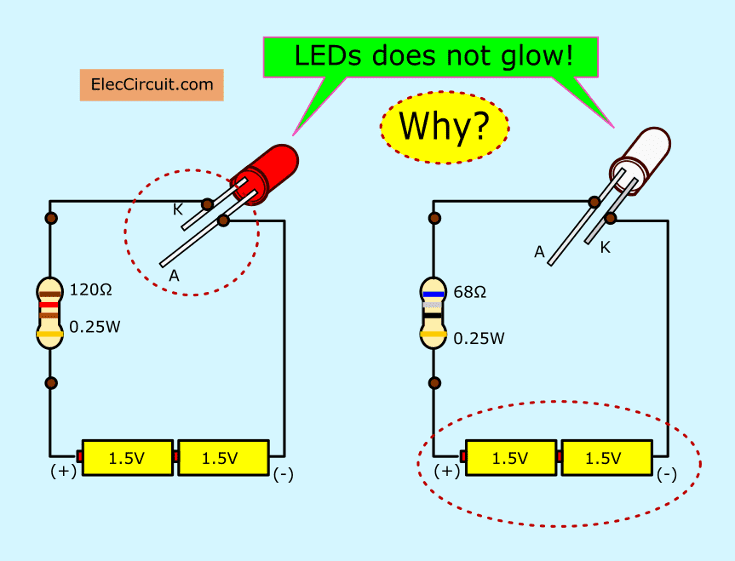
- First, the red LED is connected in a reverse biased or wrong way.
- Second, the white LED requires 3.6V of a power supply. But now it has 3 battery only.
How to use a white LED
We add another 1.5V battery to a circuit. Now we have a 4.5V battery. So we can use them for the white and blue LEDs.
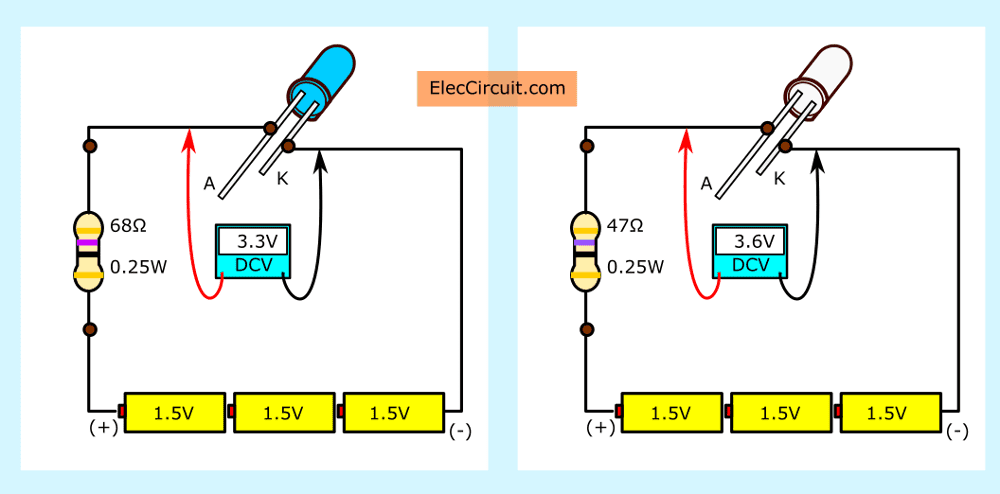
How to use blue and white LED with 4.5V or 5V battery.
This is just a basic how of using LED. When you make real projects. It may be good ideas for you.
Example of real uses LED
When doing, we probably understand electronics more.
DIY simple 12V LED light
A LED light bulb is being popular more than a conventional light bulb. Because It has high efficiency, low power consumption, and thus heat resistance.
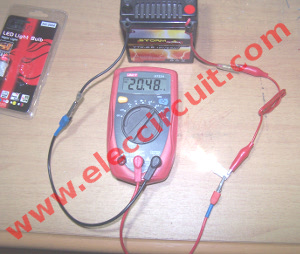
I buy the 12V LED Light Bulb For use in cars And general use
Then I tried to measure the current flowing through it is only about 20mA.
But sometimes, we need to modify something nearby. To use renewable, economical, no need to purchase additional, remove used old one better.
I try to use a different LED super bright circuit.
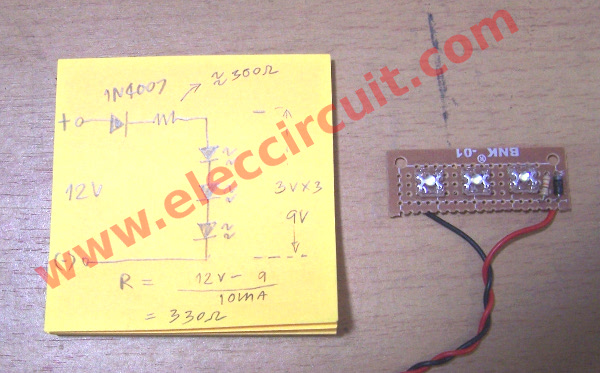
As usual, it will take a voltage of around 1.8V-4V and a current of about 10mA. When we want to keep it low power consumption. We also used a series or We bring 3 LEDs in series. If the voltage across each it is approximately 3V cause current to flow through approximately 10mA.
The diode is used to protect revers voltage to LEDs but it will reduce the voltage down from 12V into 11.3V. As the principle of it.
And use R- Resistor limits current to the 3 LEDs. You may use the formula below.
R = (11.3V- LEDVolts)/ LED currents
– LED voltage = 3Vx3 = 9V
– LED currents = 10mA
= (11.3V – 9V)/ 10mA = 300 ohms
But I use 330 ohms 0.25W
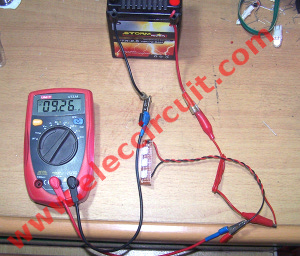
Then measure current is 9mA only. If we use a 12V battery 500mAh will use them for 50 hours. It is good for saving.
TOP 10 LED circuits

Related Posts


I love electronics. I have been learning about them through creating simple electronic circuits or small projects. And now I am also having my children do the same. Nevertheless, I hope you found the experiences we shared on this site useful and fulfilling.
very good!
Hi nguyen the tung.
Thanks for your feedback
Simple to understand and informative. Thanks
Bharath Kumar
Hi Bharath Kumar,
Thanks for your feedback. If you understand my English. Your sound is very great for me.
very detailed and easy to understand, and i like that, Thank you very much ..
Hello Rigan,
Thanks for your visit to my site. Oh… I’m so happy to hear that sounds. I have power and keep it.
I hope you happy and healthy.
Have a great day.
Thanks a lot.
Apichet.
Really helpful, easy understand.Keep up with the good work.Thanks.T N