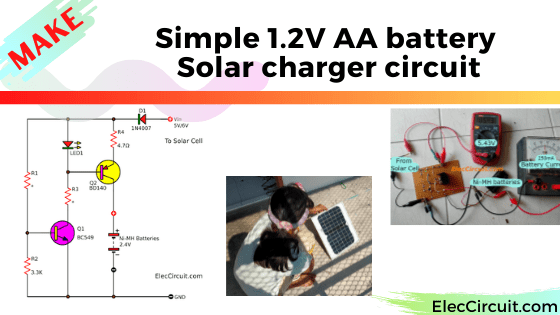
This is a simple 1.2V AA battery Solar charger circuit. Imagine, if you want to charge only one or two 1.2V AA Ni-MH batteries, and must be charged outdoor without home electricity. What could we do?
If what you have are plain components. Is it possible to use those components? to create a circuit according to this problem.
The simplest and cheapest version
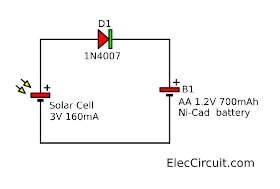
This project is the easiest and cheapest because we use a few components: a solar cell 3V 160mA, and a diode.
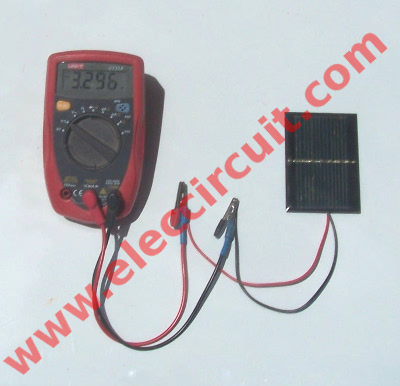
Then, I measure a solar’s voltage as around 3.3V as below. It is enough for charging a AA battery.
And, I have an AA rechargeable battery, a “Nickel-metal Hydride” type at 1.2V 700mAh. Going forward it will be called the AA Ni-MH battery.
In addition, we need to have a diode. To prevent a reverse voltage from a battery to the solar cell when there is no sunlight.
We use a number 1N4007 diode because it is a high max voltage of 1,000V 1A more than enough in this case. But it is worth more than the lower voltage model.
As figure below, we connected them as a simple series circuit.
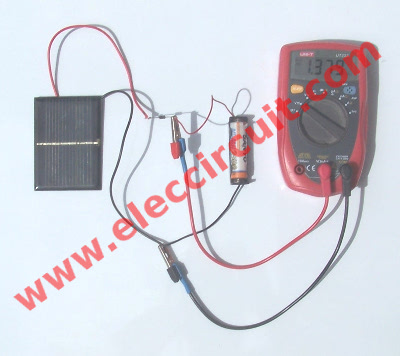
We will charge the battery for about 8-10 hours or about 8:00 to 17:00 o’clock. It will have full power after that and can be measured at its voltage of approximately 1.3V as below.
But this circuit has its own con, which is it cannot set the charging current to be constant. To extend the life of the battery. We should charge with a constant current and have a value of 0.1 of the battery’s maxed capacity or called 0.1C.
Practical example:
1.2-volt 700mAh AA Ni-MH rechargeable battery, we should charge it with a current of 700mA x 0.1 = 70mA for about 10 to 16 hours. In this way, the battery does not overheat while charging, therefore it lasts longer. It can be recharged up to 1000 times. It is really worth it.
Next, let’s look at the second circuit that solves this problem.
Recommended:
- Recycle Free Li-ion battery from E-waste
- Simple Li-ion Battery Charger Circuit with Automatic Cut-Off
1.2V AA Ni-MH battery solar charger circuit
This is the simple solar battery charger circuit. It is suitable for charging one or two 1.2V AA nickel-cadmium batteries or AA Ni-MH batteries.
Currently, this type of battery has increased capacity, but the price remains the same. For the worth, we should choose the proper battery, I chose the size 1900mAh to 2400mAh. Of course, the charging current should be increased to around 200mA at a constant level too.
This circuit can do well. Let’s see.
How simple solar Ni-MH battery charger works
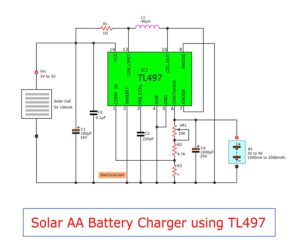
Here is the circuit to convert the voltage from the general power supply or Solar cell. This circuit causes a voltage across the battery to be around 3V.
Important conditions
The solar cell normally doesn’t supply the voltage evenly, depending on sunlight. This circuit functions to maintain a constant current level, 250mA as above. But the solar cell voltage must be more than around 5V or 6V, at 500mA of current.
Here is a solar cell of 10 watts or at 12V 0.5A.
Look at the circuit, we use two transistors for controls a steady current to the battery.
First, the resistor R1and R2 are connected as the voltage divider circuit as a current bias for an NPN transistor-Q1 works.
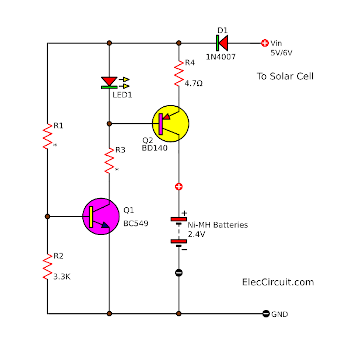
Then, LED1 light up, and its voltage is steady at approximately 1.9V, all input voltage range. At the same, this causes the steady voltage at R1 and B-E of PNP transistor-Q2, which gets a bias current.
Therefore, Q2 keeps a constant current on the AA Ni-MH batteries.
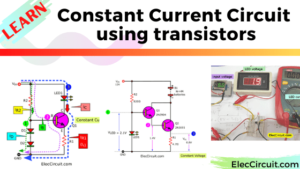
This kind of circuit we call Constant current regulator. In the past, I used an NPN transistor. But in this case, we will try to use a PNP transistor, Which works well, too.
Which R4 determines the charging current. We can easily find R4 = 1.2V ÷ IR4.
Note: IR4 is charging current, For example, in this case, I set it to be 250mA or 0.25A.
Therefore, R4 = 1.2V ÷ 0.25A = 4.8Ω or 4.7Ω at the watts size = 1.2V x 0.25A = 0.3W or 0.5W
We can use the Vin as both 5V and 6V, which we need to change:
R1: 22Ω for 5V and R1: 27Ω for 6V.
R3: 270Ω for 5V and R3: 330Ω for 6V.
Parts you will needs
Q1: BC549, 45V 100mA NPN Transistor, Quantity: 1
Q2: BD140, 80V 1.5A PNP Transistor, Quantity: 1
LED1: 3 mm Green LED.
R1: 27Ω(6V), 0.25W Resistors tolerance: 5%
R2: 3.3K, 0.25W Resistors tolerance: 5%
R3: 330Ω(6V), 0.25W Resistors tolerance: 5%
R4: 4.7Ω, 0.5W or 1W Resistors tolerance: 5%
The Solar cell 10 watts, 12V 0.5A normally load.
PCB, Battery holder, Wires, Heat sink, others.
Testing and measuring the circuit
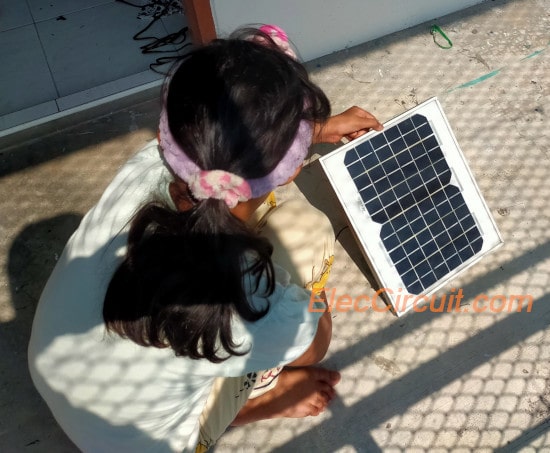
This circuit is very easy. Therefore, we can assemble it on a perforated universal PCB. My daughter soldered the leads of components directly on the bottom of the PCB copper plate. It is easier, no need to flip the PCB to put the component pins.
Then, test to charge the 1.2-volt 2,400mAh Ni-MH batteries and measure the voltage and measure the current at various points.
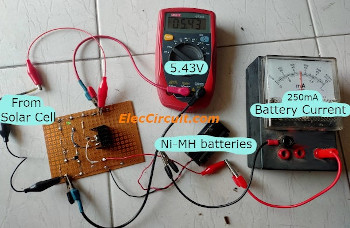
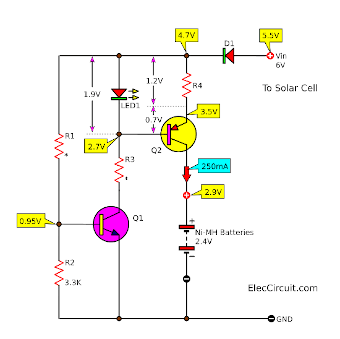
Look at the circuit diagram below. It show the level of voltage and current at various points.
- The solar voltage should be more than 5.5V.
- The battery current is 250mA in constant.
- The battery pack voltage is 2.9V while charging, but not over 3.2V.
- Measure voltage across LED1 is 1.9V fixed voltage.
- VR4 is 1.2V at all times.
- VBE of Q2 is 0.7V
The important point is that you should mount the heat sink for the Q2 because it gets a little hot while operating.
What is more? Not only that. Look:
- Simple nicad battery charger circuit by little part
- Universal nicd and nimh battery charger using LM317T
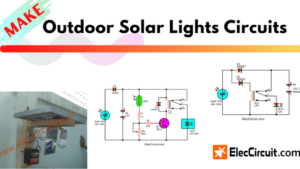
- Outdoor solar lights circuits
- Solar battery charger with overcharge protection
Download This
All full-size images and PDFs of this post are in this Ebook below. Please support me. 🙂

Related Posts

I love electronics. I have been learning about them through creating simple electronic circuits or small projects. And now I am also having my children do the same. Nevertheless, I hope you found the experiences we shared on this site useful and fulfilling.
nice sir but where we get that solar cell 3v and what will the cost
very good!
Hi,JUDE
Thanks for you feedback.
A 2V solar cell would be more appropriate for charging a single rechargeable battery. With the standard 0.7V drop of a diode, you’ll have 1.3V of charge voltage, which won’t be high enough for a maximum charge, but a Schottky rectifier diode selected for 0.5V forward voltage drop would get you 1.5V charging.
The 3V cell could charge two 1.2V rechargeable cells in series. While series charging isn’t a great approach (individual batteries have different characteristics, and when one of your batteries is going bad, series charging will present problems for the other battery), it’s not as if this solar cell + diode approach is a battery monitor with current regulation anyway. Use a Schottky diode with a circa 0.25V drop, and you’ll have about 2.75 charge voltage: 1/2 = 1.375V charge for each battery.
I get epoxied 2V 100mA cells off of AliExpress.com for about US$1.00 each in quantity.
Additionally, you should note charge current – a good rule of thumb is not to exceed 1/10 of the battery capacity – so a 2000mAh battery can take a 200mA charge – much more than that, and you’ll be damaging the battery by trying to charge it too rapidly.
I want to run 2 volt solar Christmas tree led lights that currently have a AA battery running it in a remote area during the day as well as night. it only operates at night now, the lights are 170 mA. I tried modifying with using an additional D battery hooked to another small solar charger and covered the sensor closest to the lights and it runs barely during the day and is dead by night. what do I do? this is a month long use so I don’t want to spend a lot.
a 3 volt solar cell used here for 1.2 volts. isn’t it feasible to use 2 rechargable batteries in series. 3 volt solar cell won’t trouble a 1.2 volt battery?
and second question is how will it take 8-10 hours? 700mAh battery , won’t it take approx 4,5 hours to recharge?
must reply please.
Wanting to buy a solar panel to charge 1 Aa 1.2 volt battery
I have a unique solar powered revolving colored lites. It is old and the solar panel is all weathered over. It works great for about 3days on a new 1.2 AA battery, then dies out. I just want to tie a new panel to the existing battery leads.
Can you help me out?